6 minutes
Home Lab Setup (Part 1: Proxmox & cloud-init)
This post will be the first of a few explaining how I set up my home lab setup to run a Kubernetes cluster on a Proxmox hypervisor using Infrastructure-as-code tools like Terraform and Puppet.
Why?
To me, a home lab is an essential for any IT professional. It is a domain you have full control over and can try what you want to gain real experience. This might comprise of random hardware either of enterprise of DIY quality, or perhaps be hybrid including cloud services. For this series I’ll be covering my physical setup.
In particular I’m going to briefly cover the technology choices I’ll be using; Proxmox for Virtualization, Terraform for provisioning the environment (with Puppet Bolt to bootstrap process), Puppet to manage the configuration of the environment including Kubernetes which will be the end platform.
Proxmox
Proxmox is an open source virtualization software that I personally like for it’s ease of use via web interface & command-line, with native support of LXC (Linux Containers), ZFS (battle-tested filesystem) and cloud-init (cloud templates) which we’ll be using - among other comparable features to other similar software.
In my work life, the go-to is VMWare’s vSphere or Microsoft’s Hyper-V. Both of these offer free-tiers and could be substituted here (although note last time I checked there were various limits of what you can and can’t do, as well as features that may be missing with their free tiers so be sure to investigate).
Terraform
Terraform is an Infrastructure as Code toolset that assists in defining and managing infrastructure. It integrates with a large number of other software via what it calls providers. Some of these are officially supported by Hashicorp, the company behind Terraform (and other great tools), but a number are community made. In fact in the next post we’ll be using Telmate’s Proxmox provider to have Terraform contain the logic that provisions our VM’s.
Puppet
Puppet is a configuration management tool, sort of similar to Terraform, that manages the OS layer based on code. For best functionality like enterprise implementations a Puppet master is required to ensure desired state via routine check-in. In a future post we’ll be combining Puppet with Puppet Bolt, a fairly new agent-less tool similar to Ansible, that we’ll be using to perform the Terraform bootstrapping with Proxmox and then having it setup Puppet to configure and manage a Kubernetes cluster.
Kubernetes
Kubernetes is a type of platform as a service tool-set that enables orchestration, clustering and automation of application deployments via containers. It effectively enables developers to deploy applications and associated business logic ignorant of the infrastructure, which aligns with methodologies like agile development and continuous integration and deployment. We’ll be using this in a later post to run a handful of “essential” applications like Gitlab, and later my own applications.
What this will be running on
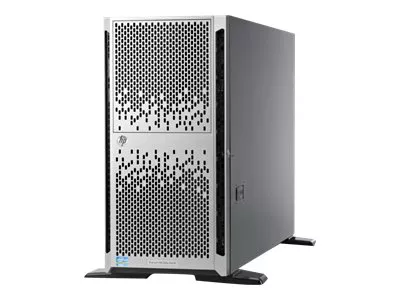
A few years ago I acquired a HP ProLiant ML350p Gen8 which while it may be a little dated now, it is more than capable for a home lab. In order to replicate this guide, you can pick something similar, or may simply wish to reduce the allocated CPU/memory to the Kubernetes cluster noted later.
- CPU: 6 Core, 12 Thread 2GHZ Xeon E5-2620
- Memory: 64GB ECC
- Storage: 200 GB (via hardware RAID)
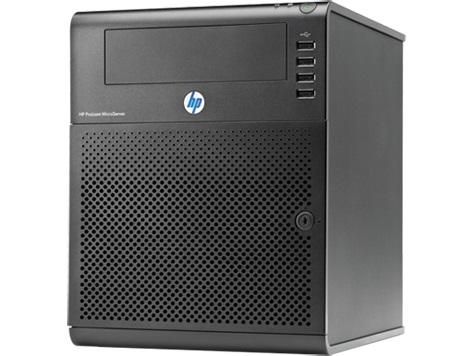
Additionally, while it won’t be discussed as part of this series, I have an older HP ProLiant MicroServer, G7 N54L that I simply using as a network storage server via Samba (4TB mirrored disks using ZFS). Part of this will be used later to mount as a persistent volume for Kubernetes
Setting up Proxmox and cloud-init
This first part of the series will talk about the initial bare metal setup of the system using Proxmox, and creation of a VM template using cloud-init. Some sections will not go into detail as it is assumed you have some IT background to even want to setup something similar!
Install Proxmox on Bare Metal
Obtain the latest Proxmox ISO from their site and place on a medium of your choice. Boot from this and follow the prompts to setup based on your network/environment requirements etc.
Be sure to upgrade any available packages released via the mirrors but possibly not packaged with the ISO (which may require a reboot).
apt update && apt -y upgrade
Setup cloud-init template
At this point you presumably have a working and updated Proxmox install. Next we will be creating a custom cloud-init template that Terraform will use (including passing in an SSH key that will later be used by Puppet Bolt)
Download your preferred Linux Cloud image
- Ubuntu: https://cloud-images.ubuntu.com
- Debian: https://cloud.debian.org/images/cloud/
- CentOS 8: https://cloud.centos.org/centos/8/x86_64/images/
I’m most familiar with CentOS (and RHEL), so I will be downloading the latest version.
wget https://cloud.centos.org/centos/8/x86_64/images/CentOS-8-GenericCloud-8.1.1911-20200113.3.x86_64.qcow2
Note: It was reported in below resources that Proxmox may have issues with .img extensions with the Ubuntu image, with the solution being renaming the file to use .qcow2
Create Virtual Machine, then configuring to use as template
Next using the command line (or web UI) we will create a VM with an arbitrary unused ID (9000) that we will later use as our cloud-init template.
qm create 9000 --name "centos8-cloudinit-template" --memory 2048 --net0 virtio,bridge=vmbr0
Next import the cloud image we downloaded earlier to the Proxmox storage (which if setup as default will be named local-lvm) using the same ID.
qm importdisk 9000 CentOS-8-GenericCloud-8.1.1911-20200113.3.x86_64.qcow2 local-lvm
This upload will name this in format “vm--disk-” which for us will be vm-9000-disk-0, so we can then attach this disk via SCSI to our VM and ensure this is the bootdisk.
qm set 9000 --scsihw virtio-scsi-pci --scsi0 local-lvm:vm-9000-disk-0
qm set 9000 --boot c --bootdisk scsi0
Then in order to allow us to later pass in supported cloud-init values, we must attach the Proxmox cloudinit image as a CDROM.
qm set 9000 --ide2 local-lvm:cloudinit
Some cloud-init functionality requires a serial console, so we also add that.
qm set 9000 --serial0 socket --vga serial0
Finally we can convert this VM image of our cloud-init image to be a template for future provisioning use.
qm template 9000
Test it (optional)
To be sure the template is usable, we can create a VM from this template and pass in some cloud-init input values to ensure the end result is a bootable (and connectable VM!) - this can be done either using the Web UI or via the following CLI commands (replacing ID’s and network config to your setup)
qm clone 9000 100 --name test-box
qm set 100 --sshkey ~/.ssh/id_rsa.pub
qm set 100 --ipconfig0 ip=192.168.0.100/24,gw=192.168.0.1
qm start 100
It may take a little bit of time, but eventually this VM should boot to a shell prompt (note: default user for CentOS 8 is “centos”), you can then SSH in and use as expected.
ssh -i ~/.ssh/id_rsa [email protected]
Note: we stopped/deleted this VM after testing
Next Steps
This first part just explains the end goal of this home lab project. In the next part (Part 2) we will define our Terraform logic of our required VM’s and their specs, and a base Puppet Bolt plan that drives the provisioning process. Hopefully this provides similar inspiration to you.
Resources
The cloud-init related steps were based off norocketscience’s post who has a similar goal but used the Ubuntu images.